How to Find the Location of a Photo (4 Simple Ways)
Gloria · Nov 16, 2025

Field workers and teams take a lot of photos on-site to document the progress or before-and-after. Weeks or months later, you’ll be asking yourself “where was this photo taken” over and over. I’ve been there.
1. Where the Location Data is Stored
Before diving in, let’s demystify one word you will come across a lot the moment you search “how to find where a photo was taken”—EXIF. EXIF (Exchangeable Image File Format) is metadata embedded automatically into digital photos.
2. How to Check Photo Locations on Windows or Mac
The simplest way to read EXIF data is already built into your computer. No apps, no subscriptions. Simply follow the steps below:
Windows System
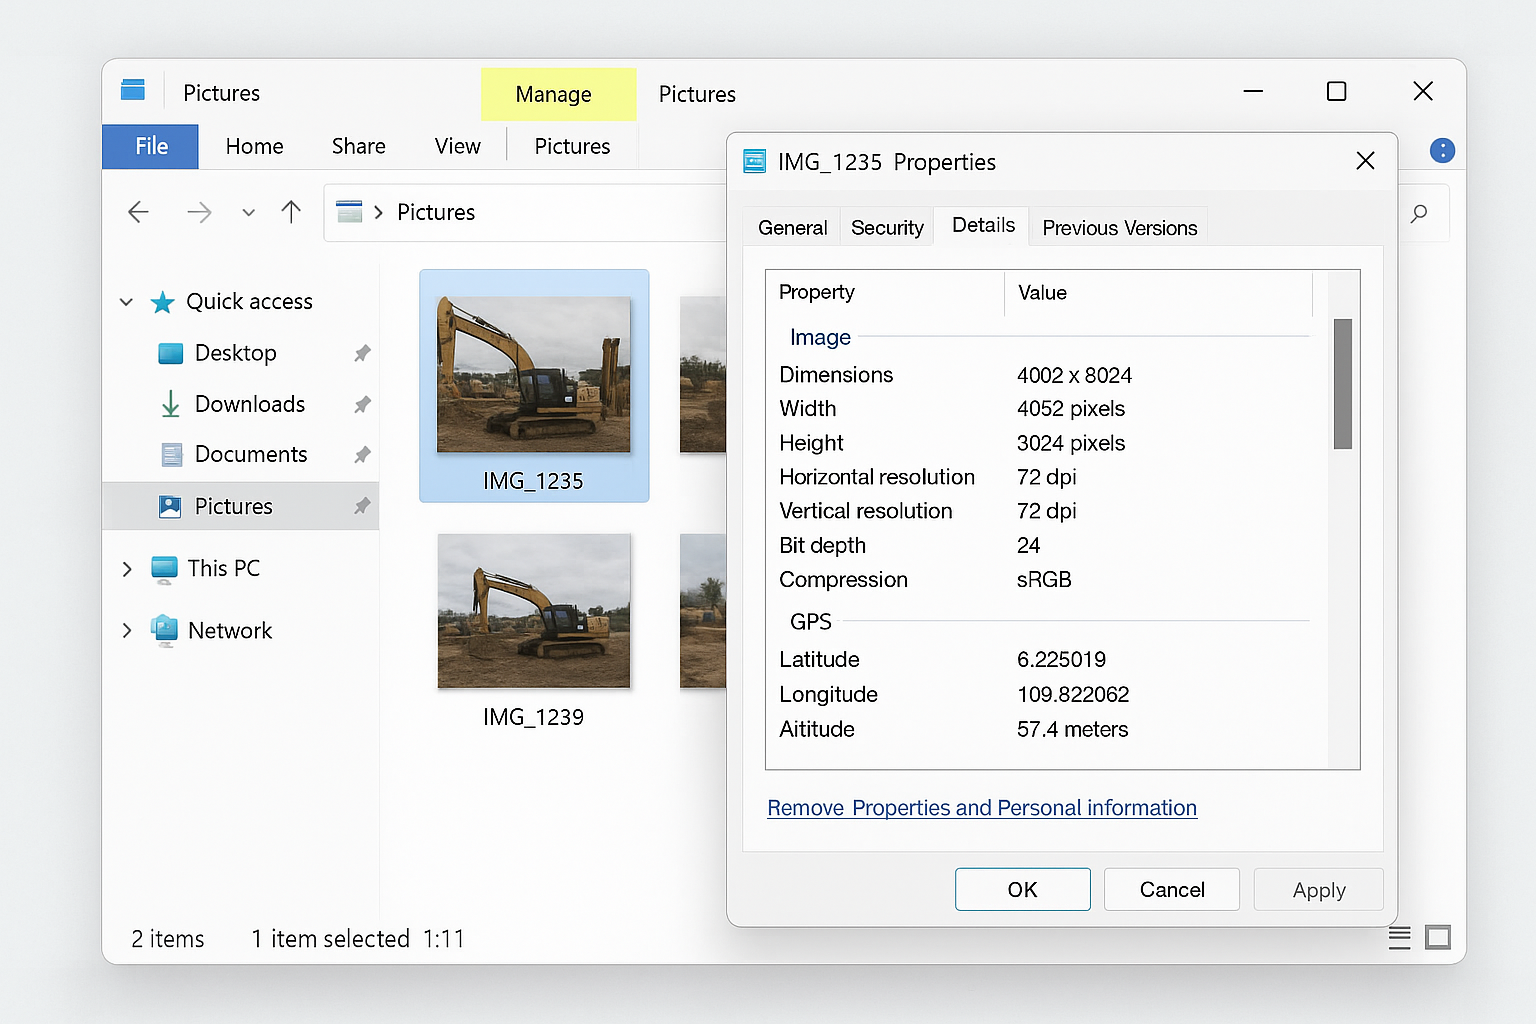
- Right-click the photo file you want to check.
- Select "Properties" at the bottom of the menu.
- In the pop-up window, switch to the "Details" tab.
- Scroll down to find the "GPS" or "Location" area. If the photo contains location data, you will see the latitude and longitude values; some systems may even provide a direct map link.
Mac System (macOS)
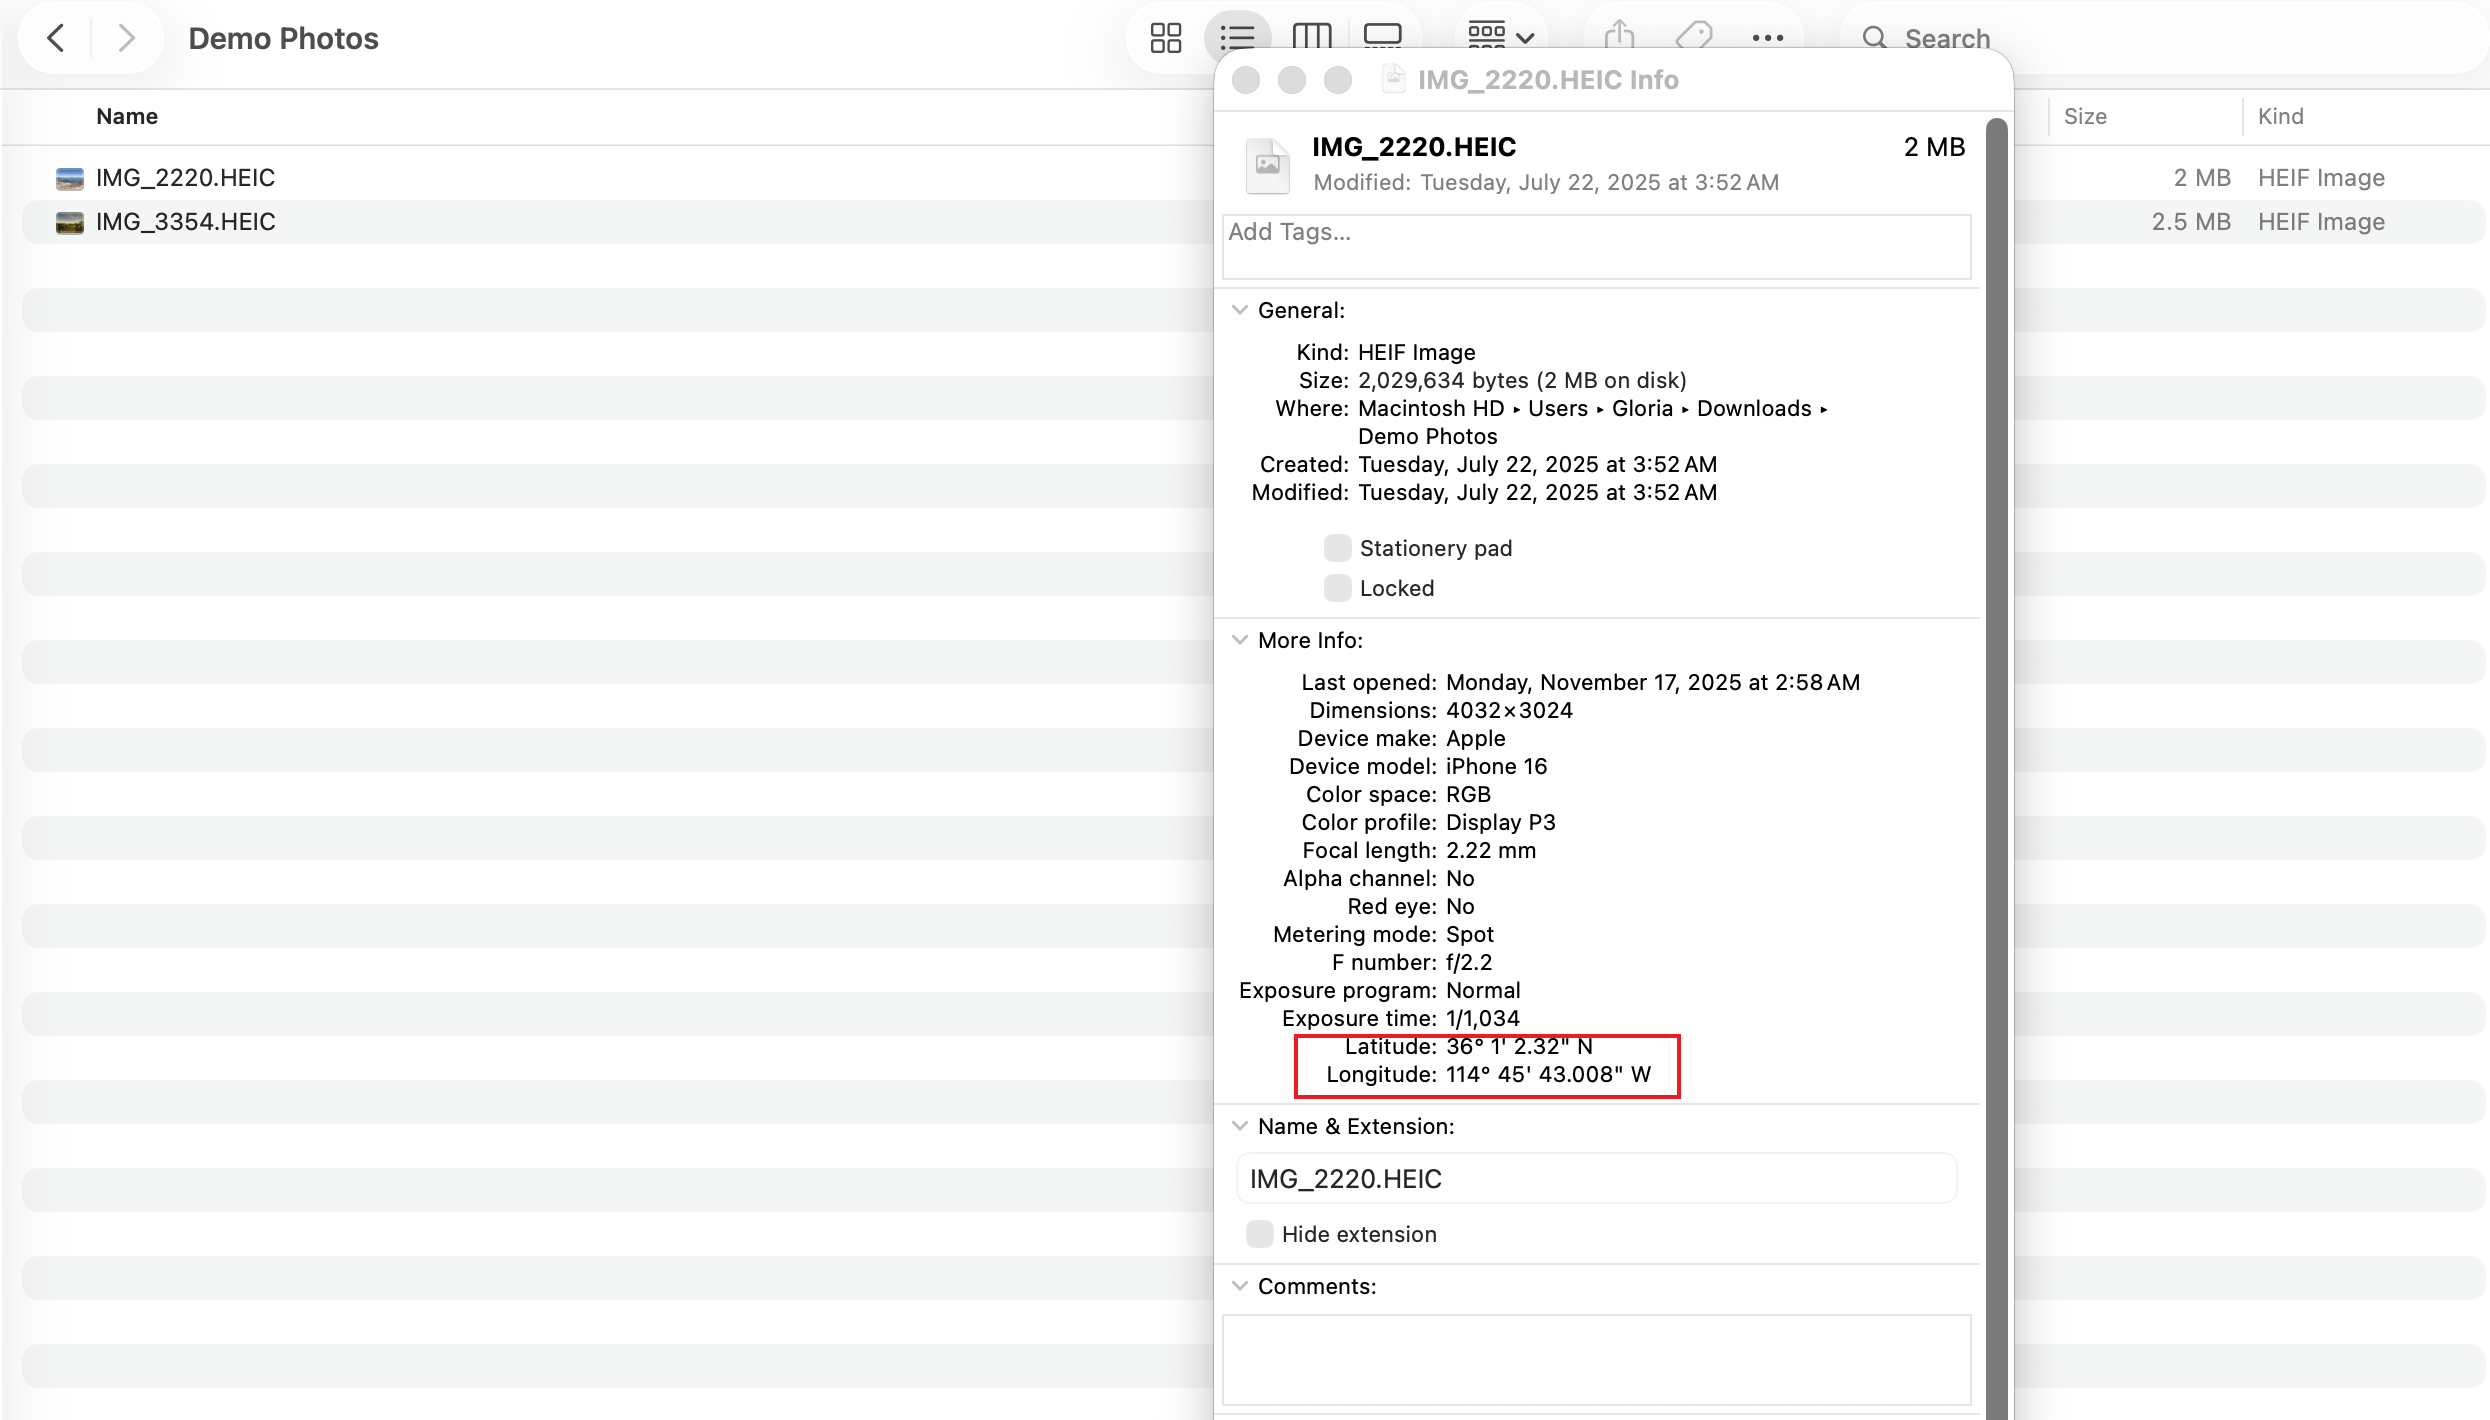
- Select the photo file in the Finder.
- Click "File" in the menu bar, then select "Get Info" (or use the shortcut Command + I).
- In the Info window, expand the "More Info" or "GPS" section. If location information is present, the system will often display a map below, pinpointing the capture spot.
But here’s the catch: If you’re checking hundreds of photos, this method becomes a few hours of mind-numbing, error-prone clicking. Second, if you're a Project Manager receiving photos from subcontractors? You’ve probably already seen the bigger issue: Messaging apps often strip EXIF data entirely.
3. How to Check Photo Locations on iPhone or Android
Nowadays we all rely on our phones to capture everything. Field crews even more so. So it just feels natural to check the photo’s location right there in the album.
iOS (iPhone)
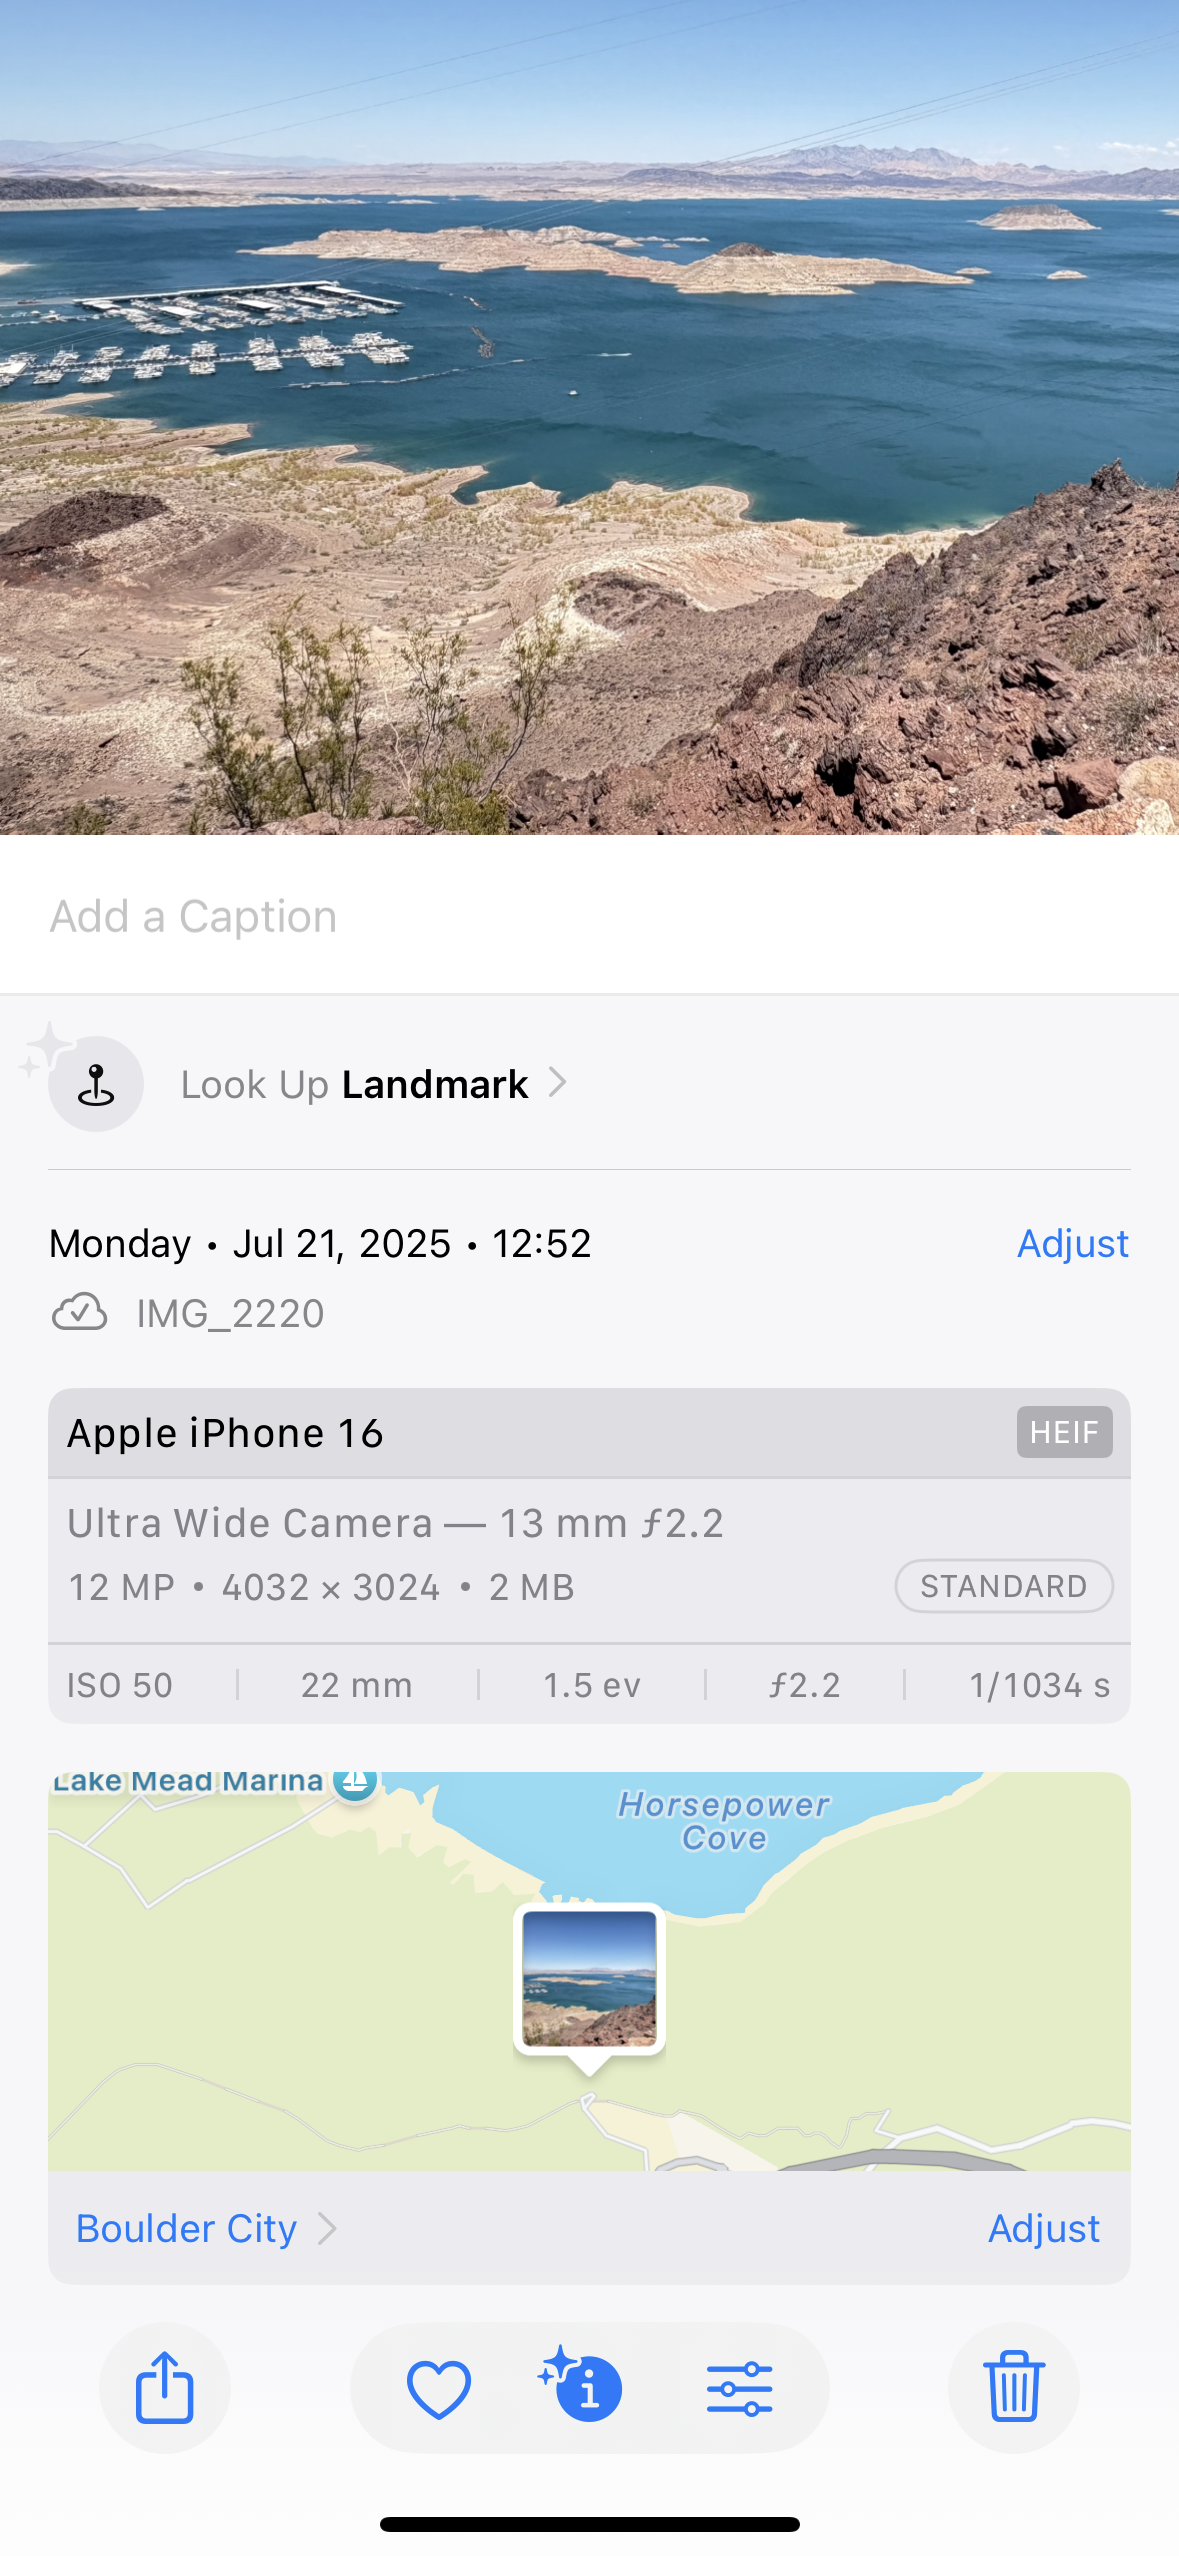
- Open the "Photos" App.
- Tap on the target photo, then swipe up on the screen.
- A map and address of the shooting location will be displayed directly below the image. You can tap the map for further details.
Android
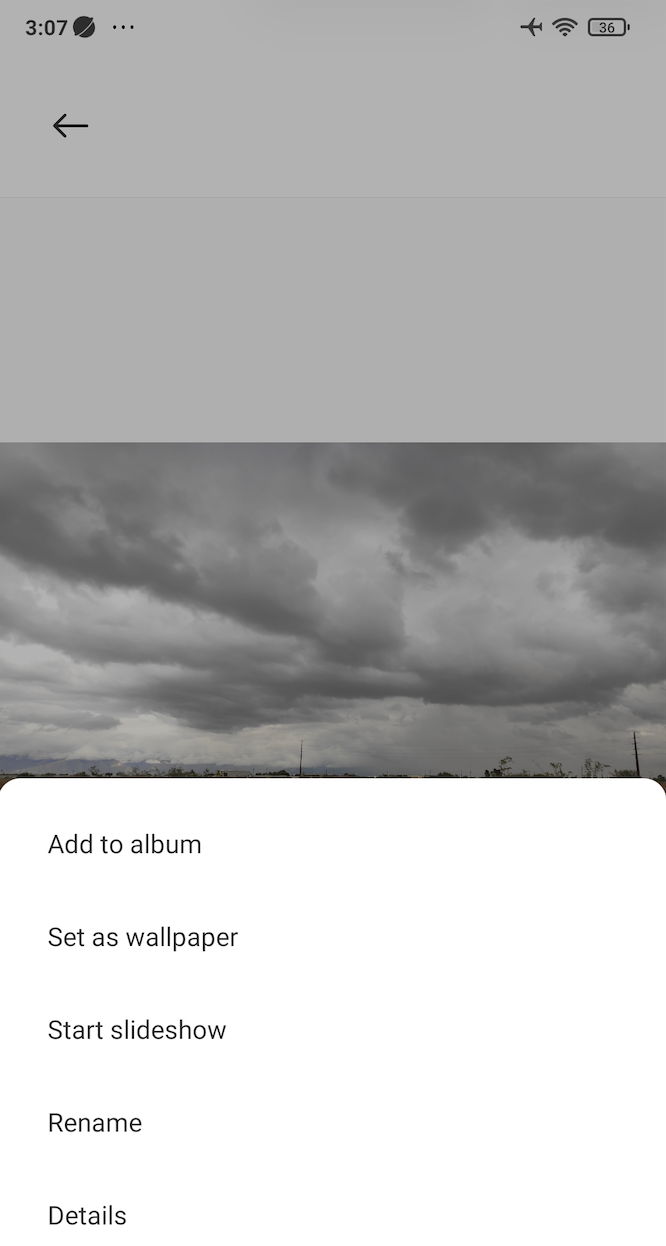
- Open your "Gallery" or "Photos" App.
- Tap on the target photo.
- Tap the "More" icon (usually three dots), and select "Details" or "Properties".
- You will see the shooting location information, often including a map display.
4. How to Check Photo Locations in Bulk
If you manage multiple sites or handle dozens (sometimes hundreds) of photos every week, you already know how painful checking photos one by one is.
However, this method still depends entirely on whether metadata survived the sharing process. If you work heavily with field photos, the ideal approach is not to retrieve location data later, but to capture it cleanly at the moment of shooting. Read on!
5. A Faster and Reliable Way: Use a GPS Camera
Tip from my experience: The simplest and most reliable way I’ve found isn’t trying to reverse-engineer a photo’s location later. Instead, stamp the exact GPS info on the photo the moment you take it.
That’s where GPS camera apps come in. Many contractors, surveyors, security teams, telecom crews, and inspectors are using a GPS camera application like Timemark Camera on a daily basis.
Benefits of stamping GPS data directly on photos:
- The location is visible on the photo itself. You save time from taking extra steps to get that data
- You never lose metadata when photos are forwarded
- Eliminate human errors when managing multiple projects
- Faster reporting and customer hand-offs
6. How to Use a GPS Camera
I’ll use Timemark Camera as an example. Timemark is so easy to use that even team members who avoid technology can pick it up in 3 minutes.
7. What to Look for When Choosing a GPS Camera
Scrolling through the app stores, you’ll run into GPS camera or GPS map camera apps with similar names. After trying basically every major one on the app stores, here’s what I’ve found actually makes a difference in field work:
- Data accuracy: If the location isn’t precise, it defeats the whole purpose. Test it before deploying it to your team.
- Tamper-proof: If someone can fake the GPS data, it ruins trust. Make sure the GPS Camera prevents GPS spoofing.
- Reliability: If an app keeps freezing or throwing ads at you, it’s just getting in the way. You need something that stays steady when you’re out in the field.
- File naming:GPS data on the photo helps you save time, but digging through randomly named files is still a headache. A good GPS camera should add location or project info to the file name.
- Photo organization: Field teams capture a lot of photos. A good system sorts them into project folders so you can actually find what you need later.
- Reporting: Not a must-have, but some apps I’ve tried can even turn your photos into reports. Extra time saved!
Below is a quick comparison of top GPS camera applications (I’ve tried them all out for you!) on app stores:
Final thoughts
Finding the location of a photo shouldn’t feel like detective work. You can read EXIF manually or use a bulk metadata tool. These methods work fine for a few photos, files from a digital camera, or images that haven’t been shared through chat apps.
But things get tricky fast when you have hundreds of images, multiple sites, or a whole team sending files. If you want something reliable, fast, and tamper-proof, stamping GPS data at the moment of capture is the long-term solution.
About Timemark
Timemark is a jobsite photo documentation app with timestamp, GPS geotag, and on-site notes. With Teamspace, field teams can automatically collect, organize, search, and export job photos across projects.
Timemark empowers construction, field service, telecom, and transportation teams to capture verifiable job photos to prevent disputes, support claims, and ensure project transparency. Timemark makes job photos trusted, organized, report-ready, and searchable. For setup instructions and product guidance, visit the Timemark Help Center.