
The Property Manager’s Daily Inspection Workflow
Gloria · Jun 5, 2026

A tenant moves out on Friday. By Monday, your team finds a dented wall, a stained carpet, and a cracked refrigerator shelf. You send the deduction notice, and the tenant replies: “That was already there when I moved in.” At that point, the issue is no longer just the damage. The real question is whether you can prove what the unit looked like before move-in, after move-out, and before any repair or cleaning started.
For property managers, daily inspection is not only about walking the property. It is about creating a repeatable record that shows what was checked, when it was checked, and what condition the property was in. This photo-first SOP gives property managers and cleaning supervisors a practical daily property inspection workflow organized by zone, checkpoint, and follow-up action.
Why Daily Property Inspections Need Better Photo Documentation
Daily inspections often fail not because the team skipped the walkthrough, but because the record is too weak to prove what happened. Photos are stronger than checkmarks, but only when they are consistent and easy to find later.
If inspection photos are scattered across camera rolls, text messages, WhatsApp threads, and email attachments, the team still has to search manually when a tenant, owner, vendor, or insurance adjuster asks for proof. A stronger property management documentation process connects the photo with the date, time, location, unit, and notes from the start.
The goal is not to photograph everything. The goal is to capture the same high-risk areas every time, so the team can prove routine checks, spot changes, and resolve complaints with less back-and-forth.
The 4-Zone Walking Route Every Property Manager Should Standardize
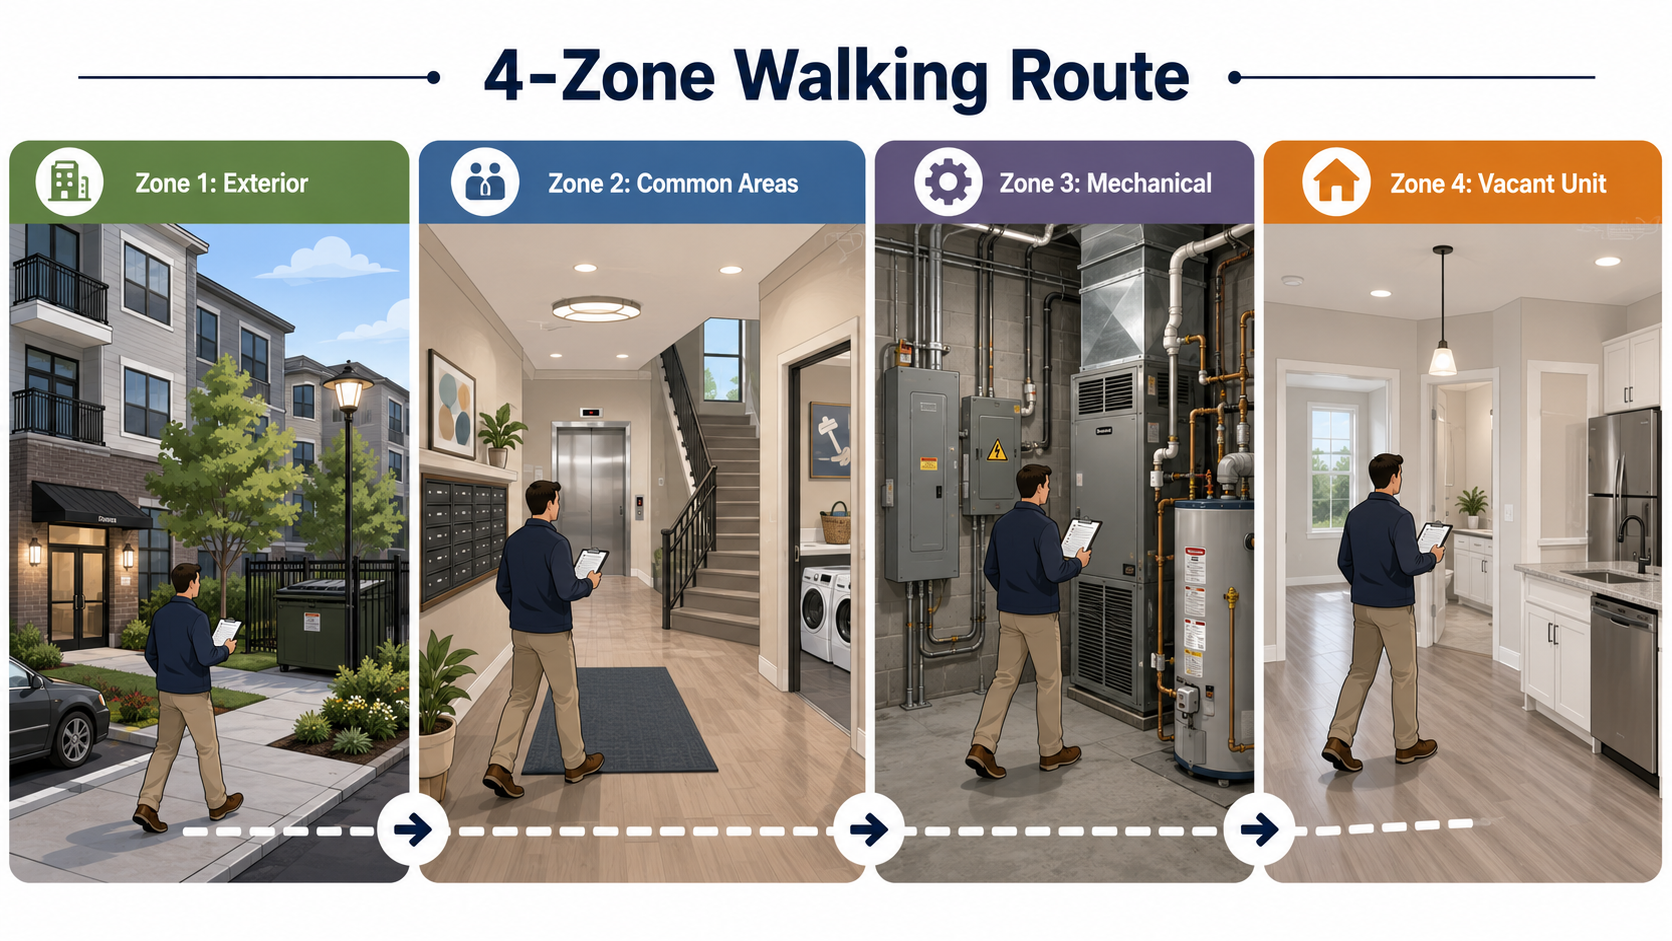
A good inspection SOP starts with a fixed route. The route does not need to make every property identical, but it should make the inspection process easy for different team members to repeat. A standardized route also makes it easier to compare conditions over time and see where documentation is missing.
Zone 1: Exteriors and Curb Appeal
Start outside, where tenants, prospects, owners, and inspectors form their first impression. Capture the entrance, parking areas, walkways, exterior lighting, landscaping, signage, gates, access points, and trash areas.
Zone 2: Common Areas and Amenities
Move through shared spaces such as the lobby, hallways, stairwells, elevators, mailroom, laundry room, gym, pool area, and lounge. For cleaning teams, these photos also work as proof of service. For property managers, they create a daily baseline for cleanliness and condition.
Zone 3: Mechanical Rooms and Utility Areas
Zone 4: Vacant Units and Turnover Areas
End with vacant units, model units, and any unit in turnover. This zone needs a more structured photo process because it directly affects leasing, cleaning, maintenance, and security deposit disputes.
Photo Checkpoints by Zone
The most useful property manager checklist does not ask the team to take unlimited photos. It tells them which photos matter most. As a baseline, each zone should have five to eight required shots, plus extra close-ups for any visible issue.
For cleaning teams, the same structure can be used as a before-and-after proof workflow. Instead of sending a loose set of “after” photos, the crew follows the property’s required checkpoints and captures the same areas after service. That makes the record easier for the property manager to review and easier for the owner to trust.
Move-In and Move-Out Photo Standards: The 30-Photo Minimum
Move-in and move-out photos need more detail than a daily walkthrough. A turnover record should be complete enough to show the unit’s condition clearly, especially in areas that commonly lead to disputes. As a practical baseline, use a 30-photo minimum per unit.
Cover the unit number, front door, entry floor, each room from the doorway, walls, corners, baseboards, flooring, closets, kitchen counters, cabinets, sink, appliances, bathrooms, mirrors, fixtures, smoke detectors, carbon monoxide detectors, window locks, and door locks. When there is existing damage, take both an overview photo and a close-up photo with a short note.
Use a Property Inspection App to Standardize the Record
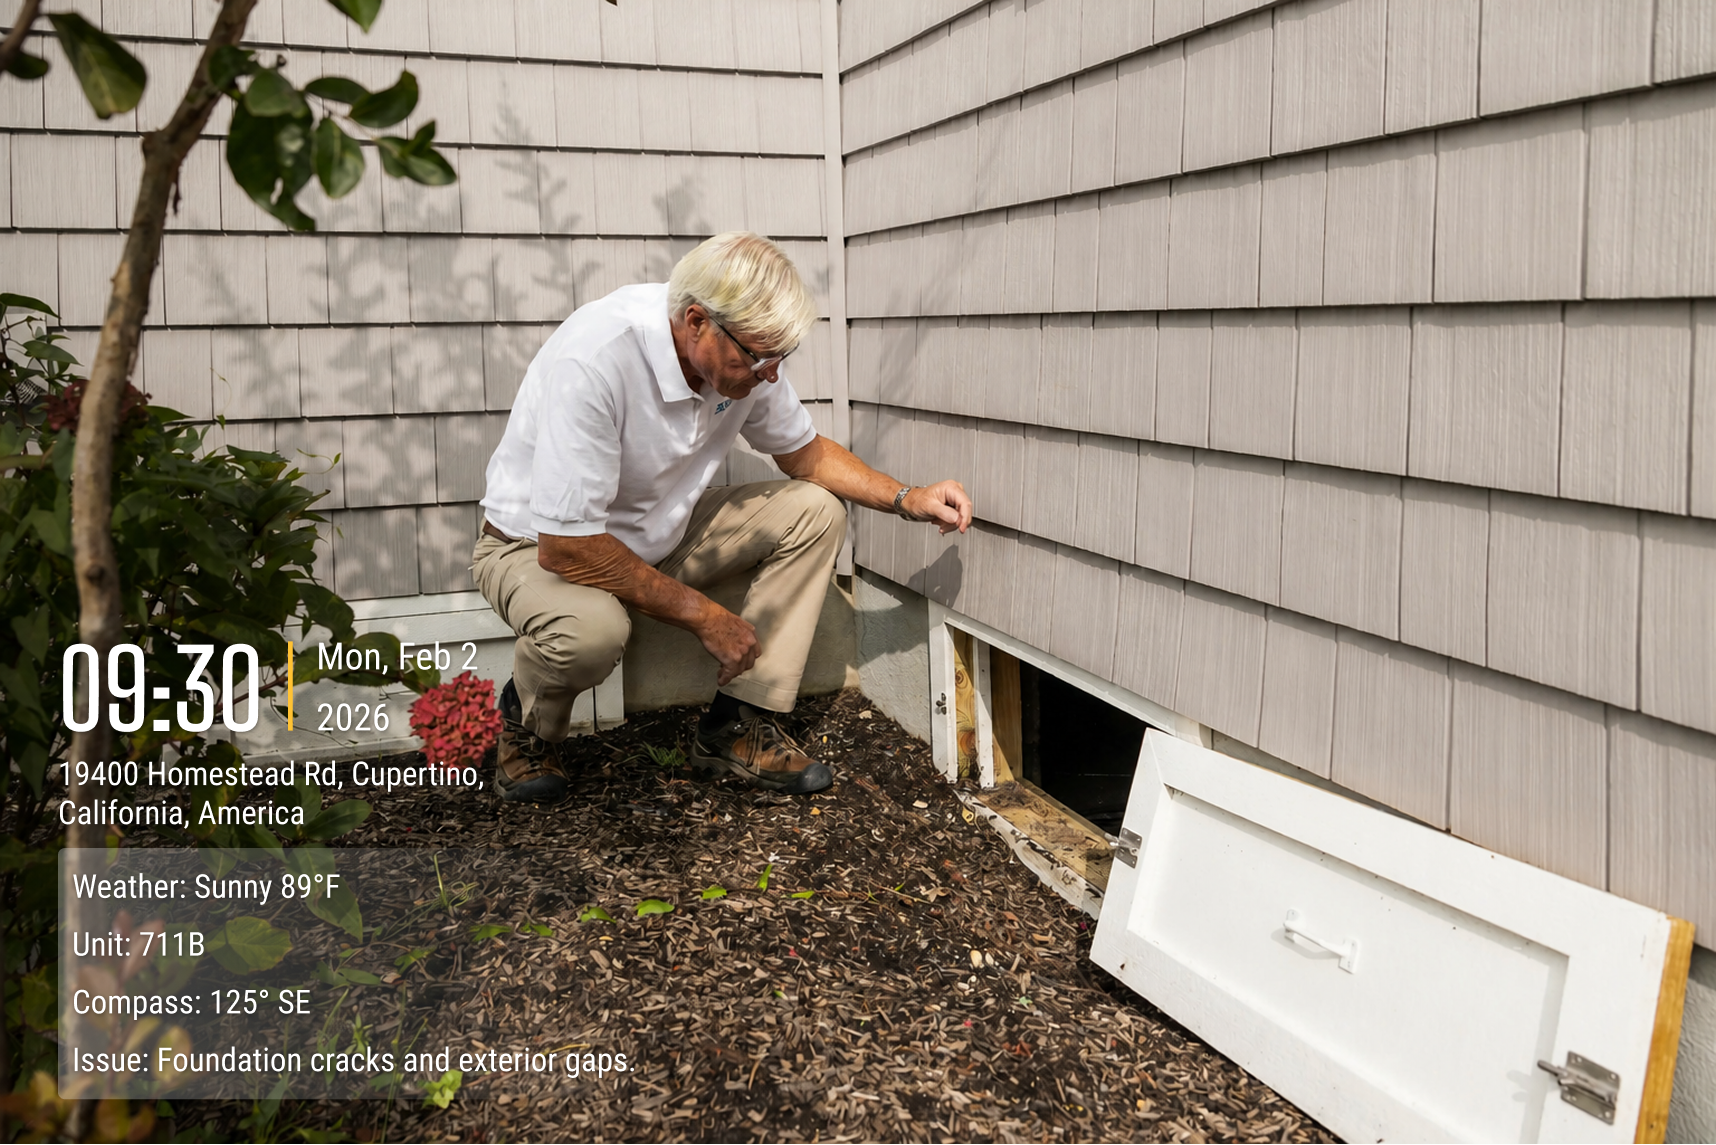
A photo-first SOP only works if the process is easy enough for the whole team to follow. If employees have to manually name files, upload photos, add unit numbers, and send updates after every walkthrough, the system will eventually break.
A good property inspection app should capture the important context at the moment the photo is taken. At minimum, each inspection photo should show or store the date, time, GPS location, address, property name, unit number, inspector, stage, and notes. For property management documentation, this context is what turns a photo from a simple image into a record.
How to Share Inspection Records With Owners and Asset Managers
Owners and asset managers do not need every inspection detail, but they do need confidence that the property is being watched. A weekly shared photo album can often communicate more than a long written update that says, “Property checked. Common areas cleaned. No major issues.”
A better owner update includes a curated set of exterior photos, common area photos, maintenance issues, completed work, vacant unit readiness, cleaning proof, and escalated risks. This gives owners visibility without forcing them to sort through every photo.
Over time, consistent building inspection photos create trust. Owners ask fewer basic follow-up questions because they can see the condition record. Asset managers can compare properties more easily because the documentation follows the same structure. When a complaint, claim, or dispute happens, the team already has a timeline instead of starting from scratch.
Daily Property Inspection Checklist
Use this checklist as the base for your daily inspection workflow.
This checklist can be printed, turned into a digital form, or used as the structure for your property inspection app. The most important point is consistency: the same zones, the same checkpoints, and the same routing rules.
Build a Photo-First Inspection SOP Your Team Can Repeat
A strong inspection SOP should help the team answer three questions: Was the property checked? What condition was it in? Can we prove it later? If the answer depends on memory, paper checkmarks, or scattered phone photos, the workflow is too fragile.
For property managers, a photo-first SOP turns daily inspection into a reliable system for reducing tenant complaints, protecting owners, supporting maintenance, and documenting property condition over time. For cleaning companies, the same workflow creates proof of service and reduces quality disputes. Start with a four-zone route, capture the same photo checkpoints, use a clear move-in and move-out standard, route urgent issues to maintenance, and save the rest to a searchable archive.
About Timemark
Timemark is a jobsite photo documentation app with timestamp, GPS geotag, and on-site notes. With Teamspace, field teams can automatically collect, organize, search, and export job photos across projects.
Timemark empowers construction, field service, telecom, and transportation teams to capture verifiable job photos to prevent disputes, support claims, and ensure project transparency. Timemark makes job photos trusted, organized, report-ready, and searchable. For setup instructions and product guidance, visit the Timemark Help Center.